Saturday, 28 August 2010

Camera Shots in music videos

Camera Cuts - 156
Meat Shots - 39
Type Of Video - Aplified
Pace - The camera movements and cuts where fast paced to match in with the pace of the song.
Genre - Alternative Rock


Friday, 27 August 2010

Video Analysis

Thursday, 1 July 2010

Sin City


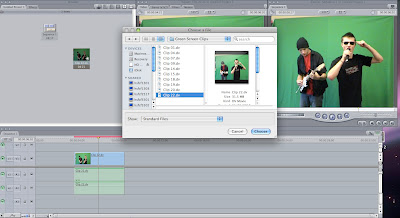
I first uploaded the green screen footage which i wanted to edit.


I then copied the the footage i then pasted it in another layer above the previous footage, i then inverted the footage so that it became negative.


In a similiare way that i edited the green screen footage, i used the chromer keyer to get rid of the all the green screen by keying it out using the keyer settings. I then used the colour tool to select the colour that i wanted to keep.


I then used a colour key so that i could key out the other colours apart from my selected colours.


Wednesday, 30 June 2010

green screen


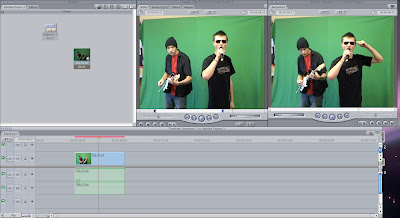
Before starting the green screen i had to open up FinalCut and then import a clip to start editing. I shortened the clip by using the mark in button to select the start of the clip i then used the mark out button to show where i wanted the clip to end. I then had to crag the clip into them time line at the bottom.


Once the clip had successfully moves into the time at the bottom, i then had to render the clip so i could edit the green screen and also so i could view it in the review window. To start editing the slip i had the place the little bar in the middle of the clip on the time line to make sure that i hat the clip selected. I then had to double clip the clip so that it went purple. Once i had done this i then had to locate chroma keyer so i could begin to key the green out. To locate this you have to go on effects, then down to video filters, then down to key and click on chroma keyer.
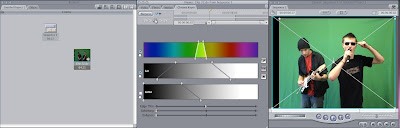

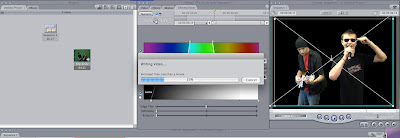
When chroma keyer had loaded i had to take a sample of the green from the green screen once i had done this i had to use the colour spectrum to make sure i had selected hr right types of green so it would be easier to key more green out. I then used the sateration key and dragged the guides to either end of the spectrum. I also used the Luma key i used this in the same way i used the sateration. I also used the soften button so smooth out the black. At the end of this all the green should have gone and the background should all be black.


This is what the background should look like after all the green has been keyed out. After successfully getting rid of all the green screen i then had to render the video so that i could edit it further.


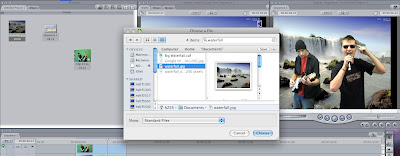
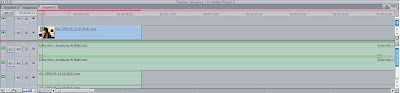
Once the video had been rendered i could then add an image or video clip to the video to use a background for the video. I inserted a picture of a waterfall to use a the back drop for the video, I had to make sure that the image was a jpeg image before adding it to the video. I had to drag the image in to the time line and place it in the layer below the video so that it would appear behind the clip. I then had to cut the image with the razor button so that it was the same length as the video clip and then i had to render it so i could view it.

Thursday, 24 June 2010

Warhol


Firstly I opened up Adobe Photeshop and pasted the image of my self into photoshop.


I then used the burn tool and used it on the image, after that i change the contrast of the picture.


I then selected the colour tint affect and used it on the image, i then also used another effect from the artistic section so creat my final warhal image. I reapeated this four times and changes the colours. I then shrunk them all down and place in a square shape to create a true warhol style.


Wednesday, 26 May 2010

Lip Sync


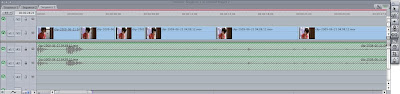
To start my lip sync task i had to upload the video clips that i had captured into final cut, i also then imported to music track i had used. I then dragged the music track into the time line below so that i could then start to add the video clips.


I then dragged the video clip into the time line so i could then begin to match up the video slip to the sound so i could get it in sync. I used the lock button next to the time line so that i could lock to music track so that it didn't move while i was editing the video clips and so i didn't slice the music when trimming the video clips.


I then clicked the clip over lays so that i could see the sound wave so that i could match the clips to the song easier to make sure that the video clips where matched up correctly. i then placed more clips in to the time line so that i could have a longer video so that it represented a music video.


Thursday, 20 May 2010

Opie


To create the opie i first uploaded the image of my self into Adobe Photoshop. I then Selected the magnetic ereaser and drag it around my self in the image and around the out side of the background. I then dleted the background so that i could replace it with a solid colour.


I repeated the cutting process with the seperate feature of my self in the video and copied them into seperate layers, i then coloured in each feature with the pait buck and paint brush tool, this was to create a cartoon affect but using the same colours.


I then selected the pencil tool and drew on specific feature such as my jaw line. After doin that with all the layers i then selected to view them all and i then saved this image.